14 Visualizing
Process
This week was a mix of academic articulation and technical implementation. Writing dissertation draft provided a refreshing opportunity to "clean up" my mental model, translating abstract research into written arguments. On the technical front, I finalized the tool's core features by simplifying state management and implementing the code export function and Game Console Preset derived from my earlier studies.
Week-fourteen
17 ~ 23. Nov, 2025Journal-by
Choi YerinKeywords
- Dissertation-Draft
- Process-Diagram
- Simplification
- Game-Console-Preset
- Code-Export
Dissertation:
Writing as Thinking
The submission of the dissertation draft was coming to the end, so I spent more time on writing and reading during the week days. This was actually a mechanism for clarity. Taking time to sit down and document the research outcomes provided a necessary distance from the code.
Writing helped me "clean up" the research outcomes in my head. It forced me to articulate why I am building this tool, moving beyond the technical "how" to the theoretical "what for."
I realized how important it is to document the process and work in a more regular basis, so that I can think through my work and plan for the future tasks.
Consultation:
Process Diagram
A "Struggling" Developer
My consultation with Andreas touched on the emotional reality of this project. I expressed that I felt "almost like a developer", caught in the cycle of fixing one bug breaking another feature :(
Andreas was supportive, acknowledging the frustration inherent in building complex logic.
To address this, Andreas suggested making this invisible labor graspable by creating a Process Diagram. I designed a visualization of my iterative building process to show that the tool isn't just a final product, but the result of thoughtful decisions and my hard working process.
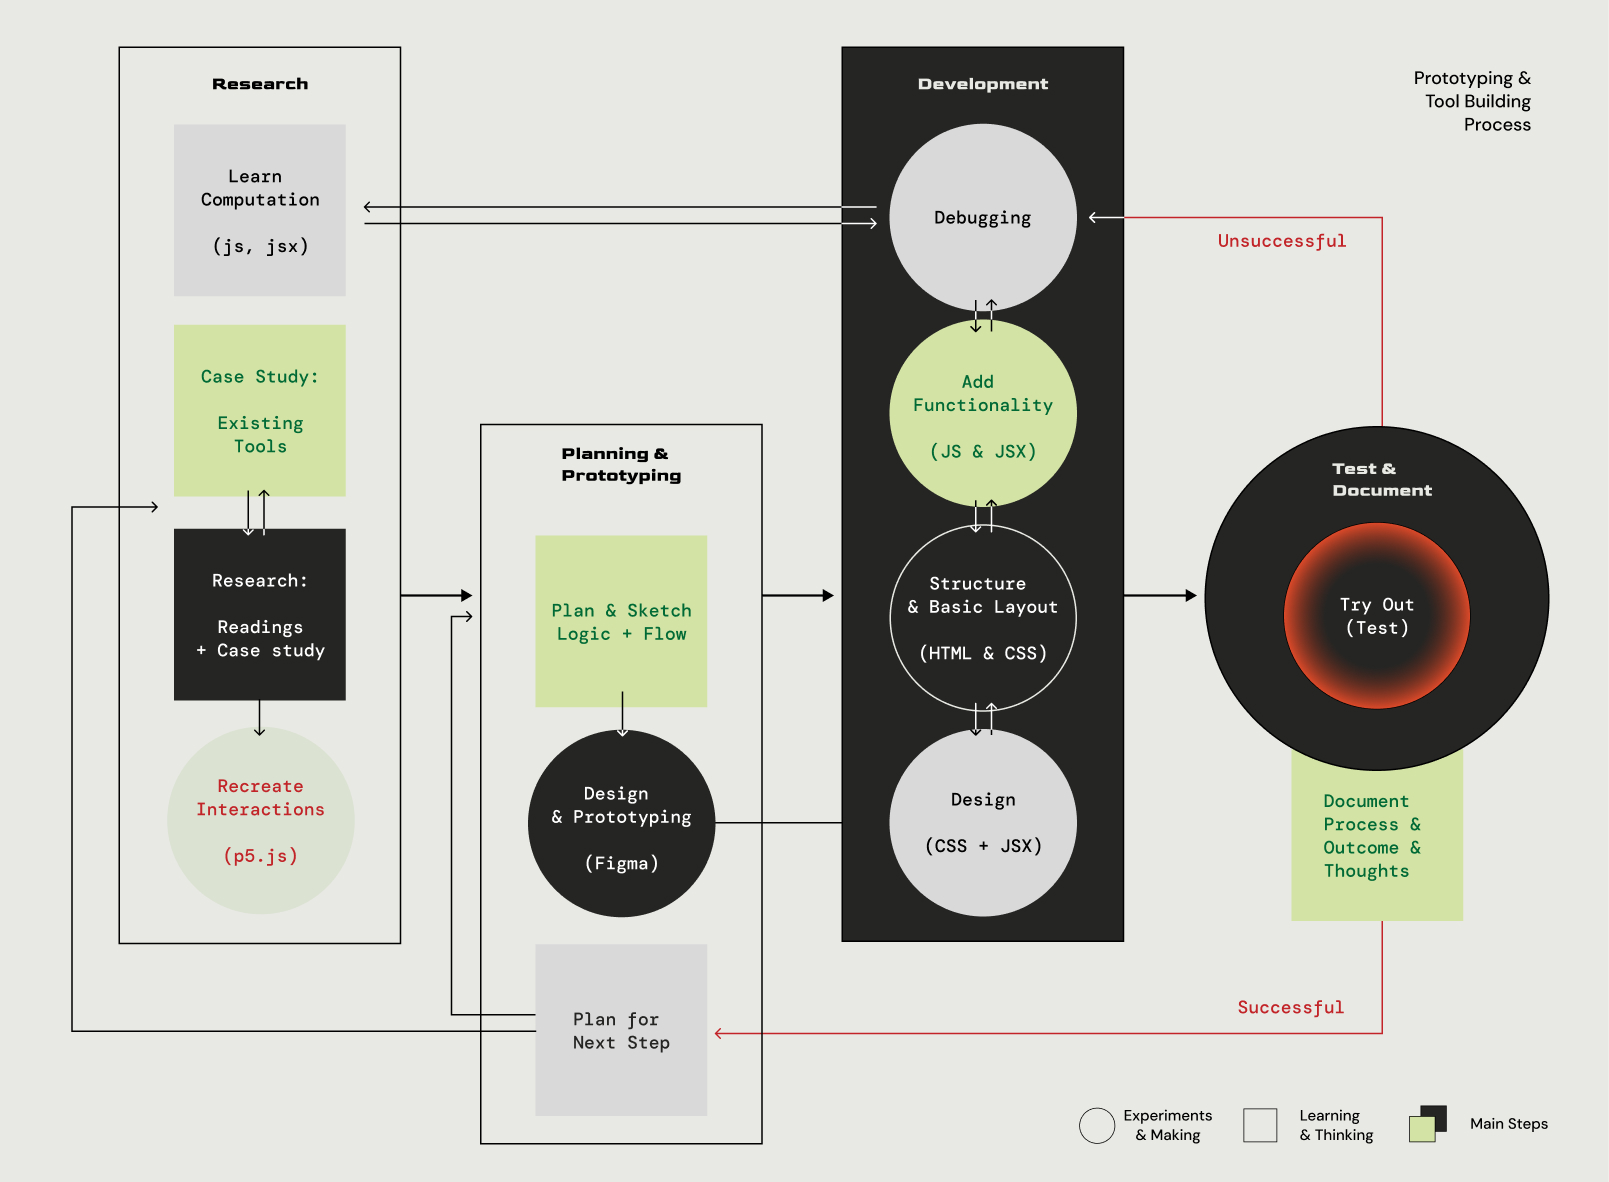
Diagram: The cycle of architectural refinement & tool building
Updates on Tool Building
Despite the focus on writing, I continued refining the tool. A critical realization hit me regarding the Button State Management I established last week because it was robust, but overwhelming for the user.
01 State Management to Transition Editor
I decided to revise the architecture again. Instead of exposing every possible logic gate to the user, I simplified the interface while keeping the complexity in the background code.
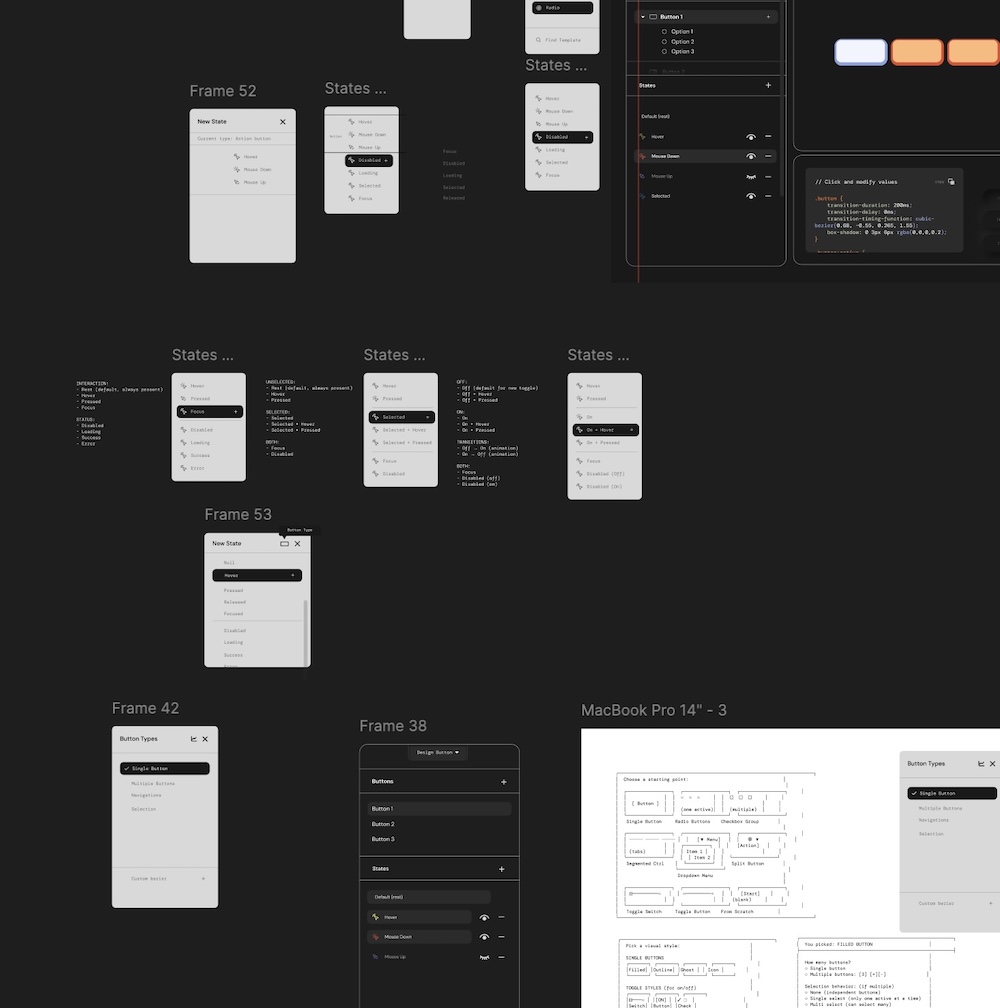
figma working file for ideating state options for button
Refinement
I moved away from managing exhaustive lists of compound states in the UI.
Implementation
I focused on Core Functions like adding functionality for transitions for feedback and ensuring the Code Preview and Export functions were robust enough for the final delivery.
Initial screenshot of New function Demo: First prototype of Transitions Editor
The first thing that I focused on building this week was the user flow and the functionality for the transition editor. As I already realized that eases and timing (duration & delay) have to work together from the previous experiments, I organized them in From > On > [Easing Curve > Duration > Delay]. For 'On', I provided users the options for adding transitions to each feedback they added or to general feedback.
However, after trying to implement functions for Easing curves, refering to easings.net I realized that complex curves should work with keyframes in css for different parameters like position, scale, color, etc, rather than using simpler cubic-bezier curves. So I implemented a bit different flow for transition editor like the image below
Screenshot of Revised Transitions Editor Prototype
02 Bridging Research to Tool
For the Catalogue of Making, I wanted to demonstrate that my tool can actually reproduce the branded interactions I analyzed. I implemented the Game Console Preset, which is the direct translation of my Duolingo computational recreation into the tool's logic.
const applyGameConsolePreset = (buttonId) => {
// 1. Physical Simulation: Remove shadow & shift Y on Press
newElement.stateFeedback['Pressed'] = [
{ type: 'Position Shift', properties: { shiftY: 6 } },
{ type: 'Effects', properties: { effects: [] } } // Clear shadow ];
// 2. Branded Motion: Elastic Easing
newElement.stateTransitions['Pressed'] = [{ curve: 'Elastic', duration: 100 }]; };
Code Snippet: The applyGameConsolePreset function embedding the Duolingo tactile illusion logic directly into the tool.
This preset proves the tool's capability: with one click, a user can apply the complex "Tactile Illusion" (shadow removal + Y-shift) and "Snappy Easing" that defines the Duolingo brand, validating the tool as a vessel for Embedded Knowledge.

First Gameconsole preset Prototype. Test
A critical thing after this phase was that for the tool to be truly useful to practitioners, the "felt" quality must be portable. It's not enough to preview an interaction; the tool must generate the code to implement it. But as I planned for this function while building, and also from my previous prototype for button parameter lab, I was more familiar with building this feature. But this time, as this feature had to be bit more comprehensive and easier to implement, I took the approach of inline javascript and stylesheet, and provided some options to only view HTML and CSS as well.
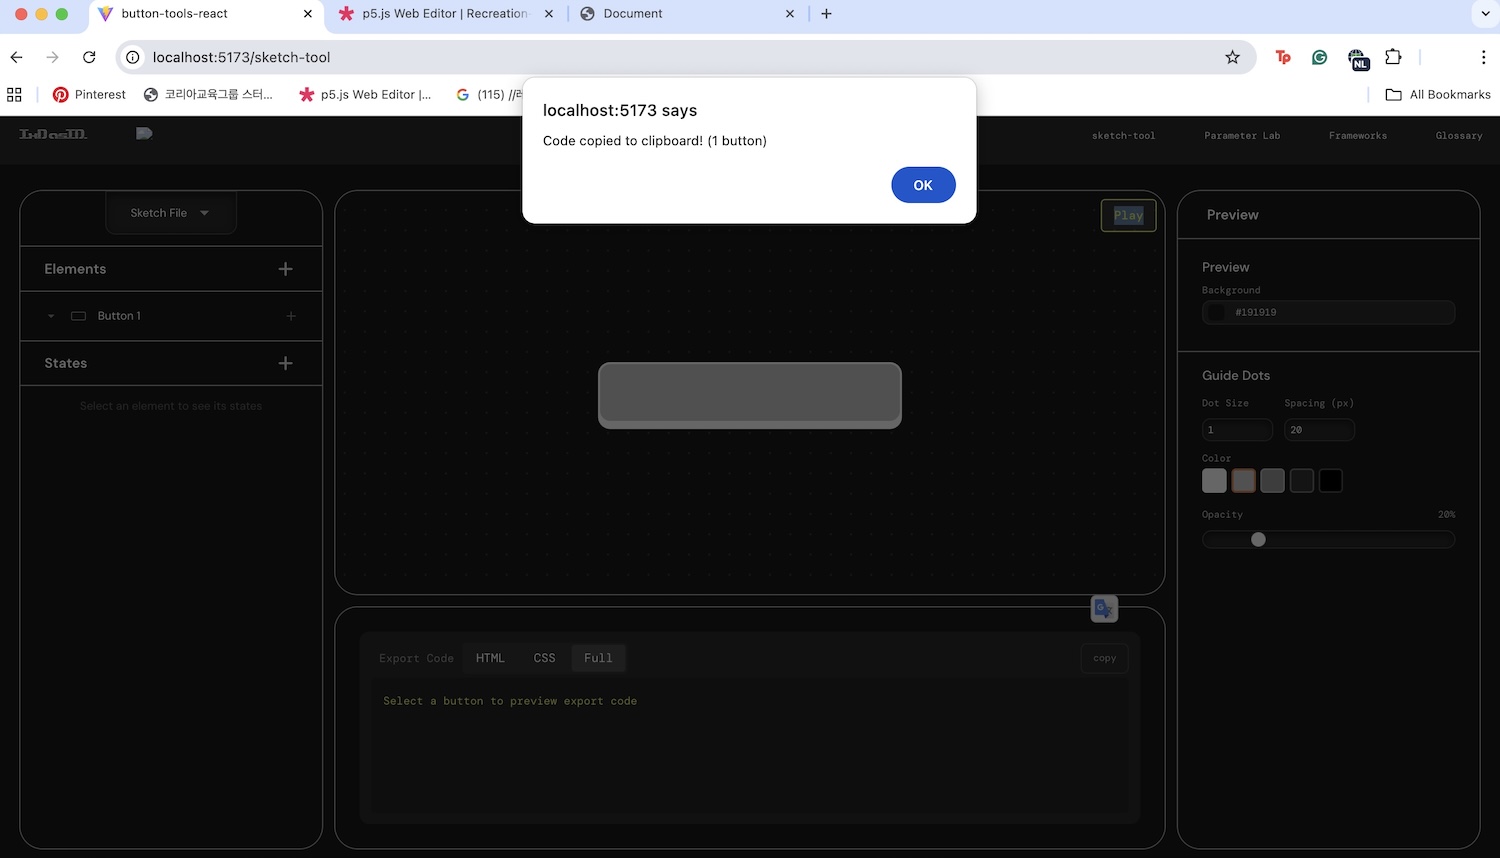
> 01 Testing copy code function
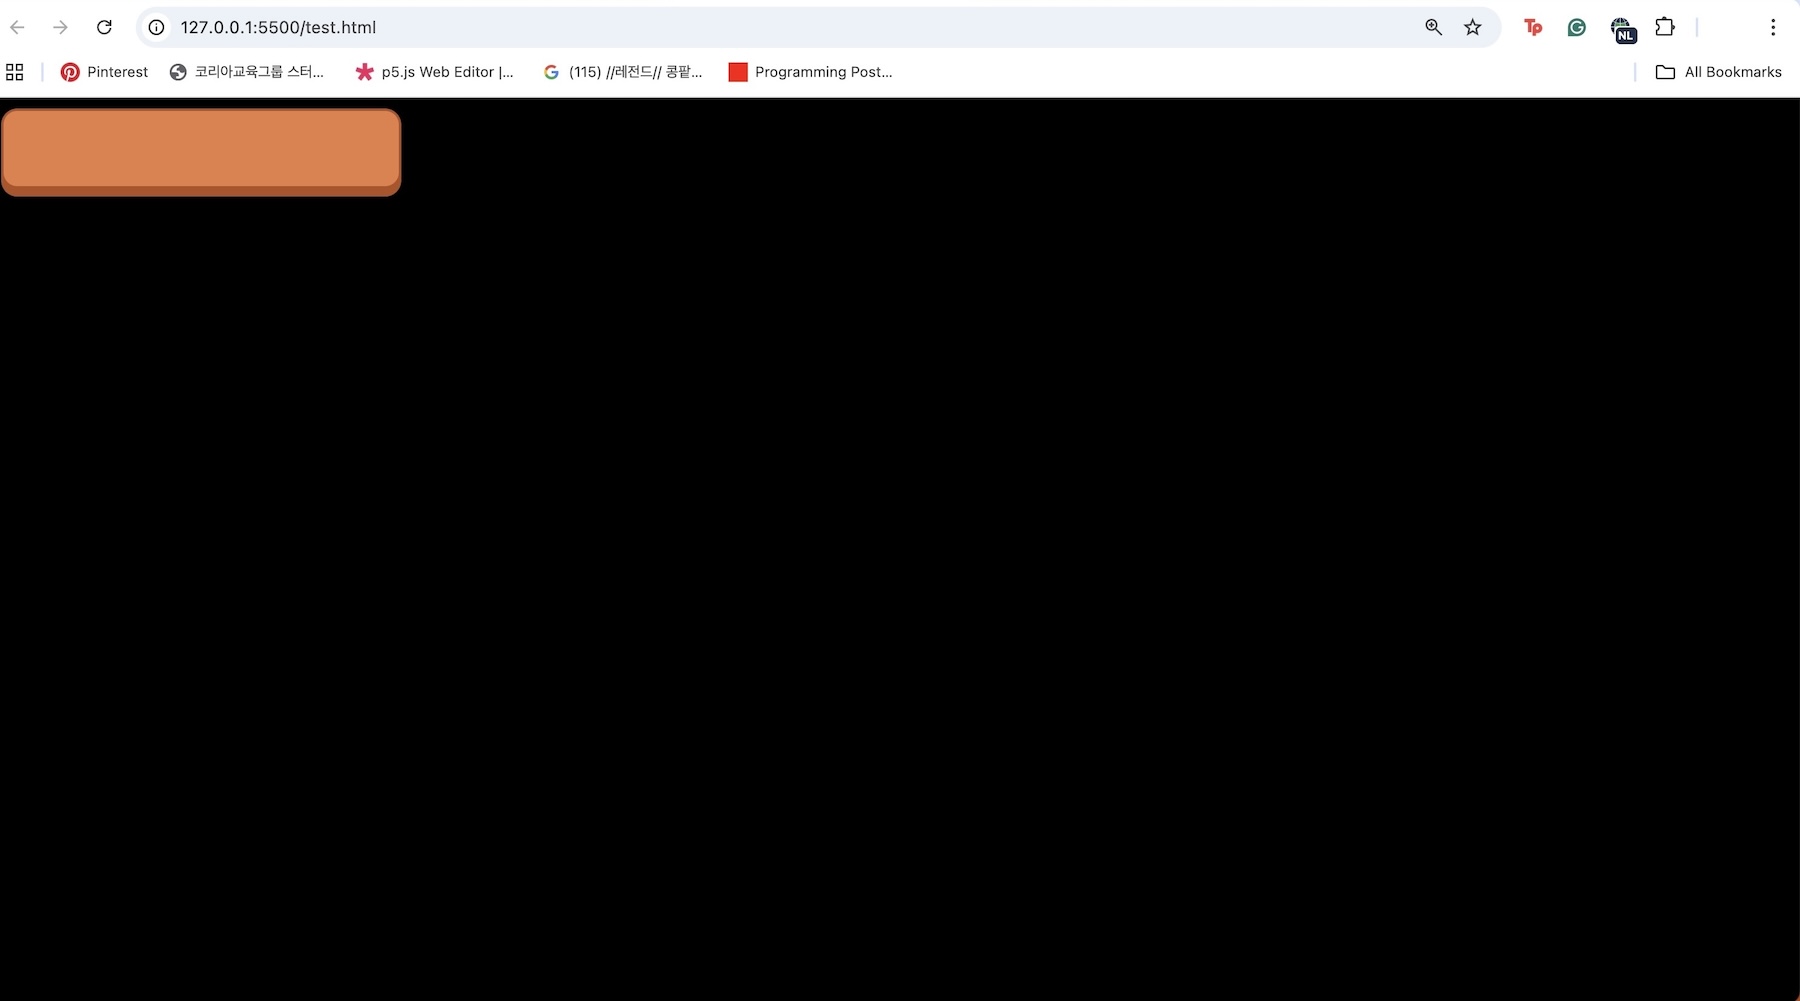
> 02 Testing implmentation of exported code in a new HTML file
Next Steps
Debugging Preview Play: During the test, I was struggling to get the transition editing feature working, and as I moved on to the code export, actually exported code was well implementing the transitions, which means that there must be some issues in the preview play. So I will have to fix this
Design Code Preview: Now that I built working export feature, I want to give a better readibility and identity to my code preview area
Catalogue of Making: Next week, I'll have to work on building catalogue of making, implementing the outcomes from my tool and research